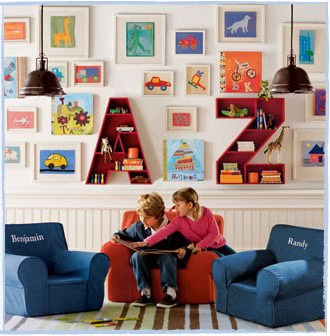
Creating a photo wall collage using photos on wood, family photos or photos on canvas is a perfect wall decor idea that can be visually stunning and used in almost any empty space in your home. A photo wall on a stairwell, in an entry or in a hidden corner will bring that area to life with its memories, smiles and beautiful occassions you will always want to remember.

A great feature of this DIY decorating tip is that its easy to change, upgrade or move. See below for various wall gallery suggestions and more DIY photo gallery tutorials for making canvas and wood photos as well as how to plan out and design your photo gallery so it looks like one seamless stylish piece.
Photo Gallery Wall Ideas
Planning is the first step in creating your own photo gallery. Collect photographs that you would like to group together. You can collect them by occassion, place, person, year or anything else that groups them together like sports, travel or even cooking. Its your own Instagram wall of fame.
Depending on how many photos you have access to, and how many you want to add to your wall, this could take a while. Are they on your phone or someone elses, do you need to scan them and are they all the same color and size? These are a few of the questions you will need to answer when planning your photo gallery.
Once you have your images together place them on the floor to see how they might look together. This will help you design your photo gallery and give you a sense of space you will need to display them.
This is when you will change, replace, and rearrange them.
Wall Decorating Ideas
To make them look like one cohesive display think about how you can frame them. You can use the same metal frame or the same material like wood through out, you can use the same size frame for all your images or print your photos with the same filter; make them all black and white, sepia or add a rustic filter.
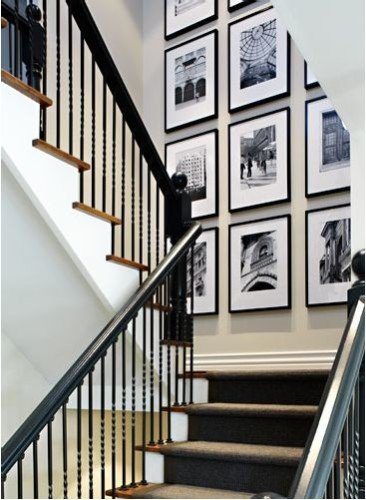
You may need to play around a little more to make sure they look like they belong together. The stairwell above has all images in black and white, in metal black frames, all the same size with a white border. Its a stunning, dramatic and classic look but creating all that uniformity takes time and money.
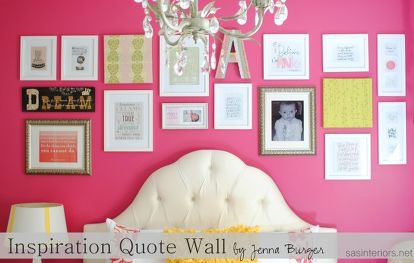
But you don’t have to use this style. Instead, you could go for an eclectic look and use a variety of frames in different sizes and colors. In this living room, pink and flowers and the connecting themes. What are yours?

Keep reading for more ideas.
Wall Gallery Above Furniture
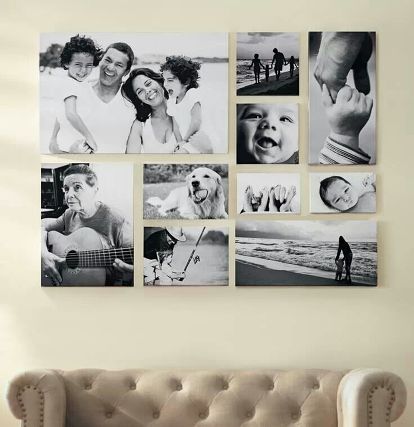
When you don’t have a lot of wall space you can create smaller wall galleries over and above furniture. For example your wall gallery could be dispalyed over a bed or couch; even in a home office. Follow some of these tips;
- Go for a wall gallery size that is at least two-thirds to the full length of your couch or bed.
- Add a minimum of two pieces to display. They should have something in common; same size, color or subject matter.
- Go maximalist. Use different sizes if you have smaller pieces; horizontal, vertical, tiny, and large.
- If your pieces are multi colored, try to balance the main color pop. For example, if you have red placed in one corner, add red in the opposite corner.
Decorating Budget
Photo galleries don’t have to be an expensive project if you DIY a lot of the elements. But its a good time to work out what it might cost before you start buying frames or ordering large sized images. If you are happy with your existing frames and images, the total wall project cost should be minimal.
However, if you want your images displayed in a certain way, where frames must match or you need images professionally enlarged or reproduced, it is time to do a full costing. Remember to add the cost of a professional designer or photographer if you decide to engage one.
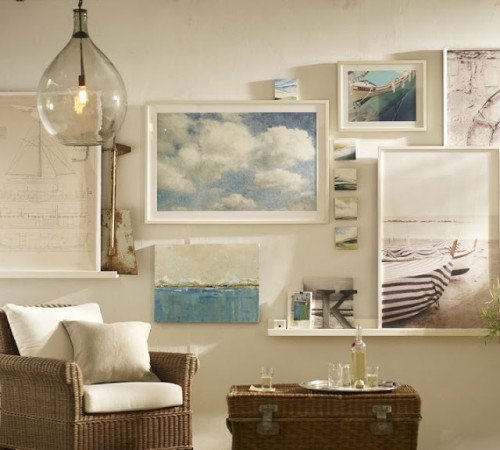
Reduce You Design Costs
Today printing images online is inexpensive and easy to do.
The additional costs come from setting up a professional photo shoot. Don’t forget to shop around. Professional photographers often run introductory packages or special offers.
You might also wanto consider a great amateur photographer; who you can engage for a lower cost. It will help them gain experiene and add to their portfolio and give you a great deal.
Another way to reduce costs; instead of replacing your existing photo frames
1. paint them the same color,
2. use the same material like wood or metal or
3. find interesting frames at garage sales or second hand stores.
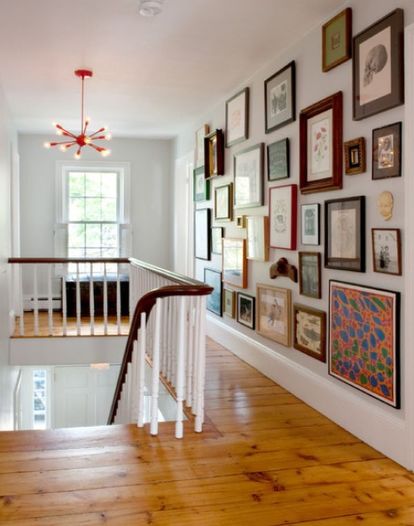
The photo gallery wall above uses the theme of nature. Floral themes sits easily alongside scientific or oceanic art. They are spaced to take up most of the wall and because of the wall gallery size looks like furniture or an installation. The walkway is too narrow to add a couch, chair, table or storage. This creates a statement without taking up valuable walking floor space.
Filling a whole wall with various framed or unframed pieces, creates one large art display and can look dramatic and impressive.
Additional Wall Display Accessories
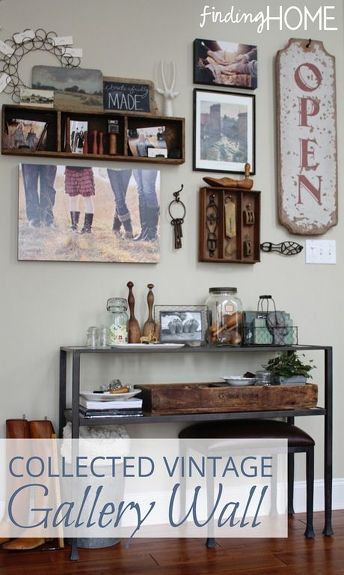
Grouping pieces can be a wonderful display. You can add anything from metal signs, wood hangings, along with family photos. The pieces above work well over this console. Its intentional and purposeful art that looks like an installation.
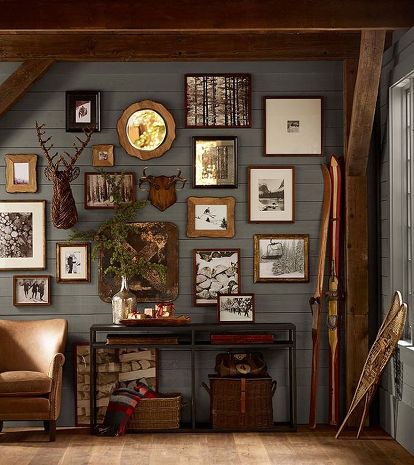
You can also add mirrors, plates, letters, clock or even a ledge to get your desired look.
Hanging Gallery Wall Frames
You may not need many tools to create your wall gallery but patience comes in handy, along with a second pair of hands. But you will need;
- pencil
- level
- measuring tape
- hammer
- painters tape
- picture hangers and nails
- Collect the items to be hung on your wall.
- With masking tape set the design out either on the floor or on a table.
- Use the largest piece as your anchor. It often goes in the middle of your design, to ground your design. But off center can often look more interesting.
- Hang this piece first, then all the others according to your design.
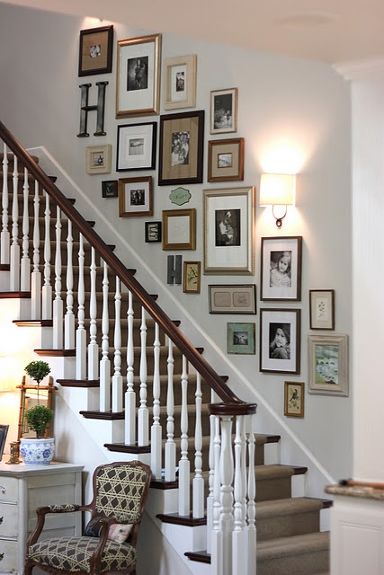
The photo gallery above is full of different style and sized frames, initials in different sizes and all in line with the gradient of the stairs.

If creating holes in your walls makes you go faint, try creating your gallery photo wall on shelves instead. Again, make sure there are some things that tie the group together such as black and white images and similar frames, wooden or metal objects or letters and initials. These add curiosity and interest and the heart shaped pieces add softness to the very straight lined display.
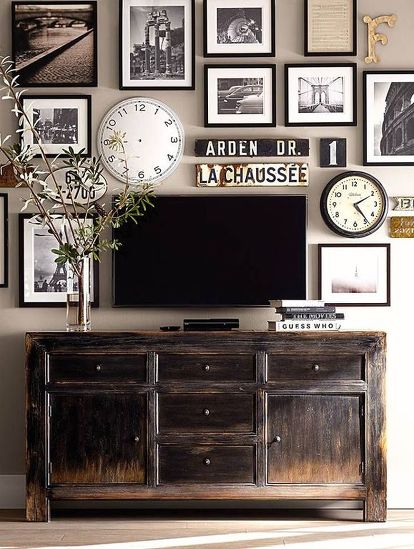
While you are looking at all the interesting images, street signs and clocks, did you notice the television? Probably not. If you don’t have space for a televison storage unit, this is a great way to hide it in plain sight.
Gallery Wall Arrangements
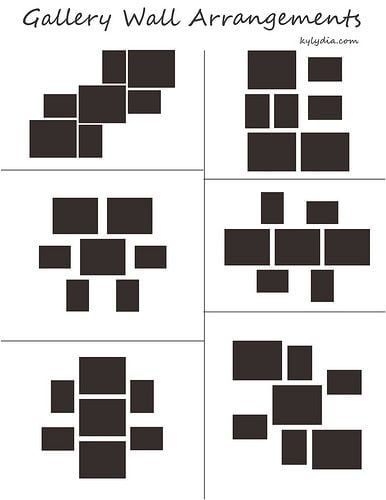
For many people, placing frames, photos and objects on the floor, doesn’t really give them the full visual impact of the real thing. You can instead, using kraft paper or newsaper, cut out each item and add them to your wall with painters tape. You can move them around, until you get the design you love without damaging the wall paint and before you have drilled your first hole.
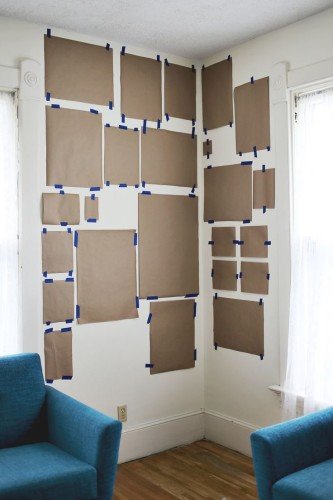
Again, start building your design around you main or largest piece of paper. When all your items are on the wall, they fit, and you are ready mark the center point of the wall, and start hanging your pieces.
Photos on Wood
Getting away from traditional photos, for a more rustic look you can use photos on wood. You can easily create family prints as seen in this video below. They work perfectly as gifts too.
You can also use white wash, glossy or antique finishes can change the look of the final wood photo to go with your decor and style. Here’s a video with great tips.
Console Gallery
Its simple, using the wall decor ideas above, to create a stylish vignette on your console. Your console is the backdrop and can be easily updated with bowls, lamps, indoor plants and more.

Start your photo gallery today using some of these ideas and the many treasures you have at home. Love this? Add it to Pinterest or Facebook or simply join our email list for future blog posts.


