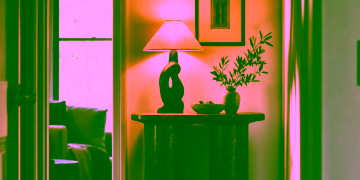


Great Homes Have Vignettes Where You Least Expect Them
Walk through any truly memorable home and you’ll notice something.
You can’t cross a hallway without wanting to pause.
You can’t pass a doorway without your eye catching on a small moment — a lamp, a painting, a bowl that looks suspiciously perfect for dropping your keys and your troubles.
It feels like the house has staged tiny scenes just for you.
Estimated reading time: 19 minutes
Designers have a word for those scenes: vignettes (sometimes called nooks or settled moments).
Most advice stops at what to put in them.
This article is about where they should go.
Because the secret isn’t just a well-styled console. It’s knowing that the end of a hallway, the sliver of wall between two bedrooms, or the “nothing” corner by the stairs is actually the most valuable design real estate in your home.
Once you see it, you can’t unsee it — and you’ll never walk past a blank wall the same way again.
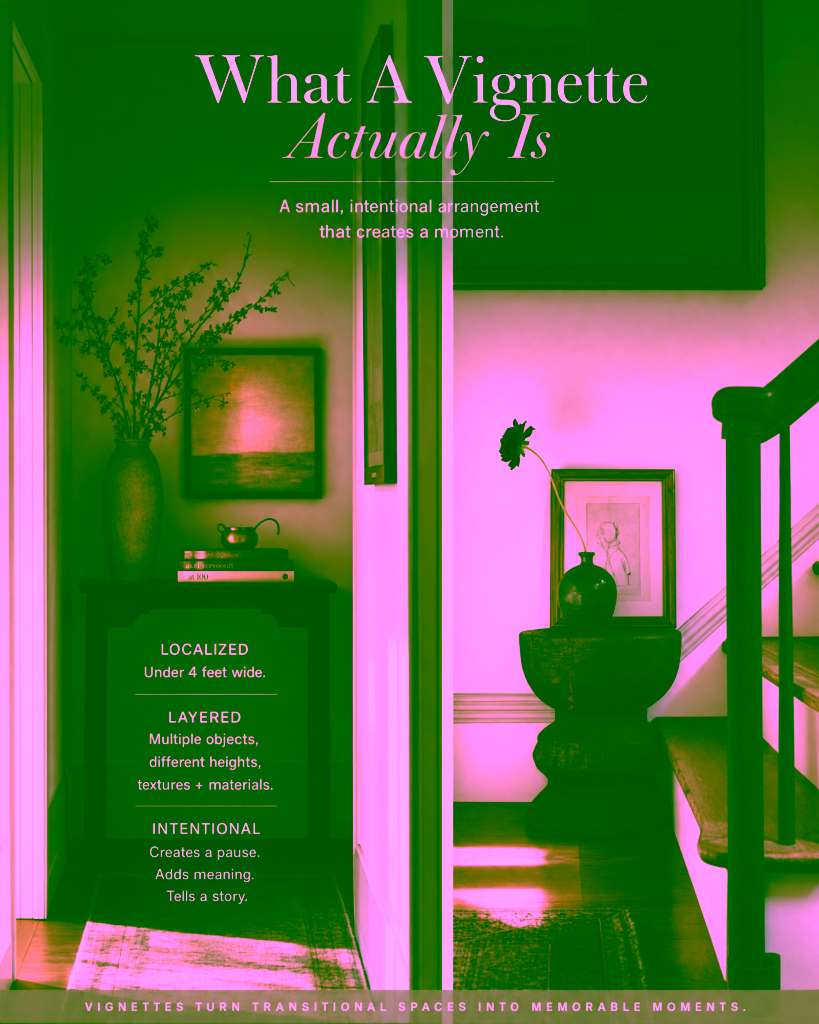
What A Vignette Actually Is (And Why You Keep Looking)
Vignettes are small, self-contained visual moments — usually a combination of furniture, objects, art, and light — that tells a story in one glance. While a nook is often a physical, architectural space, a vignette is a curated, visual arrangement of objects. A vignette is often placed within a nook to make it feel more intentional and cozy. For example, you can create a vignette (a small lamp, a vase, and a favorite book) on the desk of your study nook.
Vignettes are not contained by architecture. They are created and then built:
- Localized (it lives in one spot, often under 1.2 m / 4 ft wide)
- Layered (more than one object, more than one height)
- Intentional (it has a purpose: to welcome, to pause, to delight, to anchor)
You can absolutely build one on:
- An entry console
- A sideboard
- A bedside table
- A mantel
And that’s where most Pinterest boards stop.
But in grand homes, vignettes are less about “the console” and more about the pause.
They are placed where you naturally slow down:
- At the end of a hallway
- At a decision point between rooms
- On a landing, mid-stair
- In that weird “what do I do with this” corner in the living room
The things you put in them matter. They transform a space into a curated focal point, adding personality, warmth, artistic structure and even function within a home where there was none before. A vignette tells a story about the owner’s tastes, memories, or lifestyle.
Where you put them is what makes the house feel expensive.
The Rooms You’re Forgetting To Decorate (Clue: They’re Not Really Rooms)
If you’ve ever felt, “My house feels flat, but all the big rooms are furnished,” this section is for you.
The biggest missed opportunities aren’t your living room or your bedroom.
They’re the in‑between bits:
- Hallways
- Corridor dead-ends
- The slice of wall between two bedroom doors
- That narrow space between kitchen and dining
- Stair landings
- Awkward wall runs beside or behind doors
These spaces are rarely on a floor plan as “rooms,” so we don’t decorate them like rooms. We treat them as runways or corridors: purely functional, get-in-get-out.
Designers don’t.
Designers look at how you move through a house — the circulation — and ask, “Where does the eye and body naturally pause?”
That’s where they quietly install a vignette.
How To Start Seeing “Vignette Real Estate” In Your Own Home
Take five minutes and do this:
- Stand at your front door.
Walk the path you take most days: entry → kitchen → living → bedroom. - Notice where you slow down or turn.
Corners, junctions, spots where you wait for someone, or where you drop a bag. - Now notice the walls and floor around those spots.
Is there:
- A blank end to a hallway?
- 60–90 cm (24–36″) of wall between two doors?
- A corner that is empty except for skirting board and dull lighting?
Anywhere you can stand comfortably without blocking a doorway is a contender for a vignette (or even a nook)
No tape measure yet. Just awareness. You’re mapping the “beats” in your home — the moments where a small visual story would actually be seen and felt.
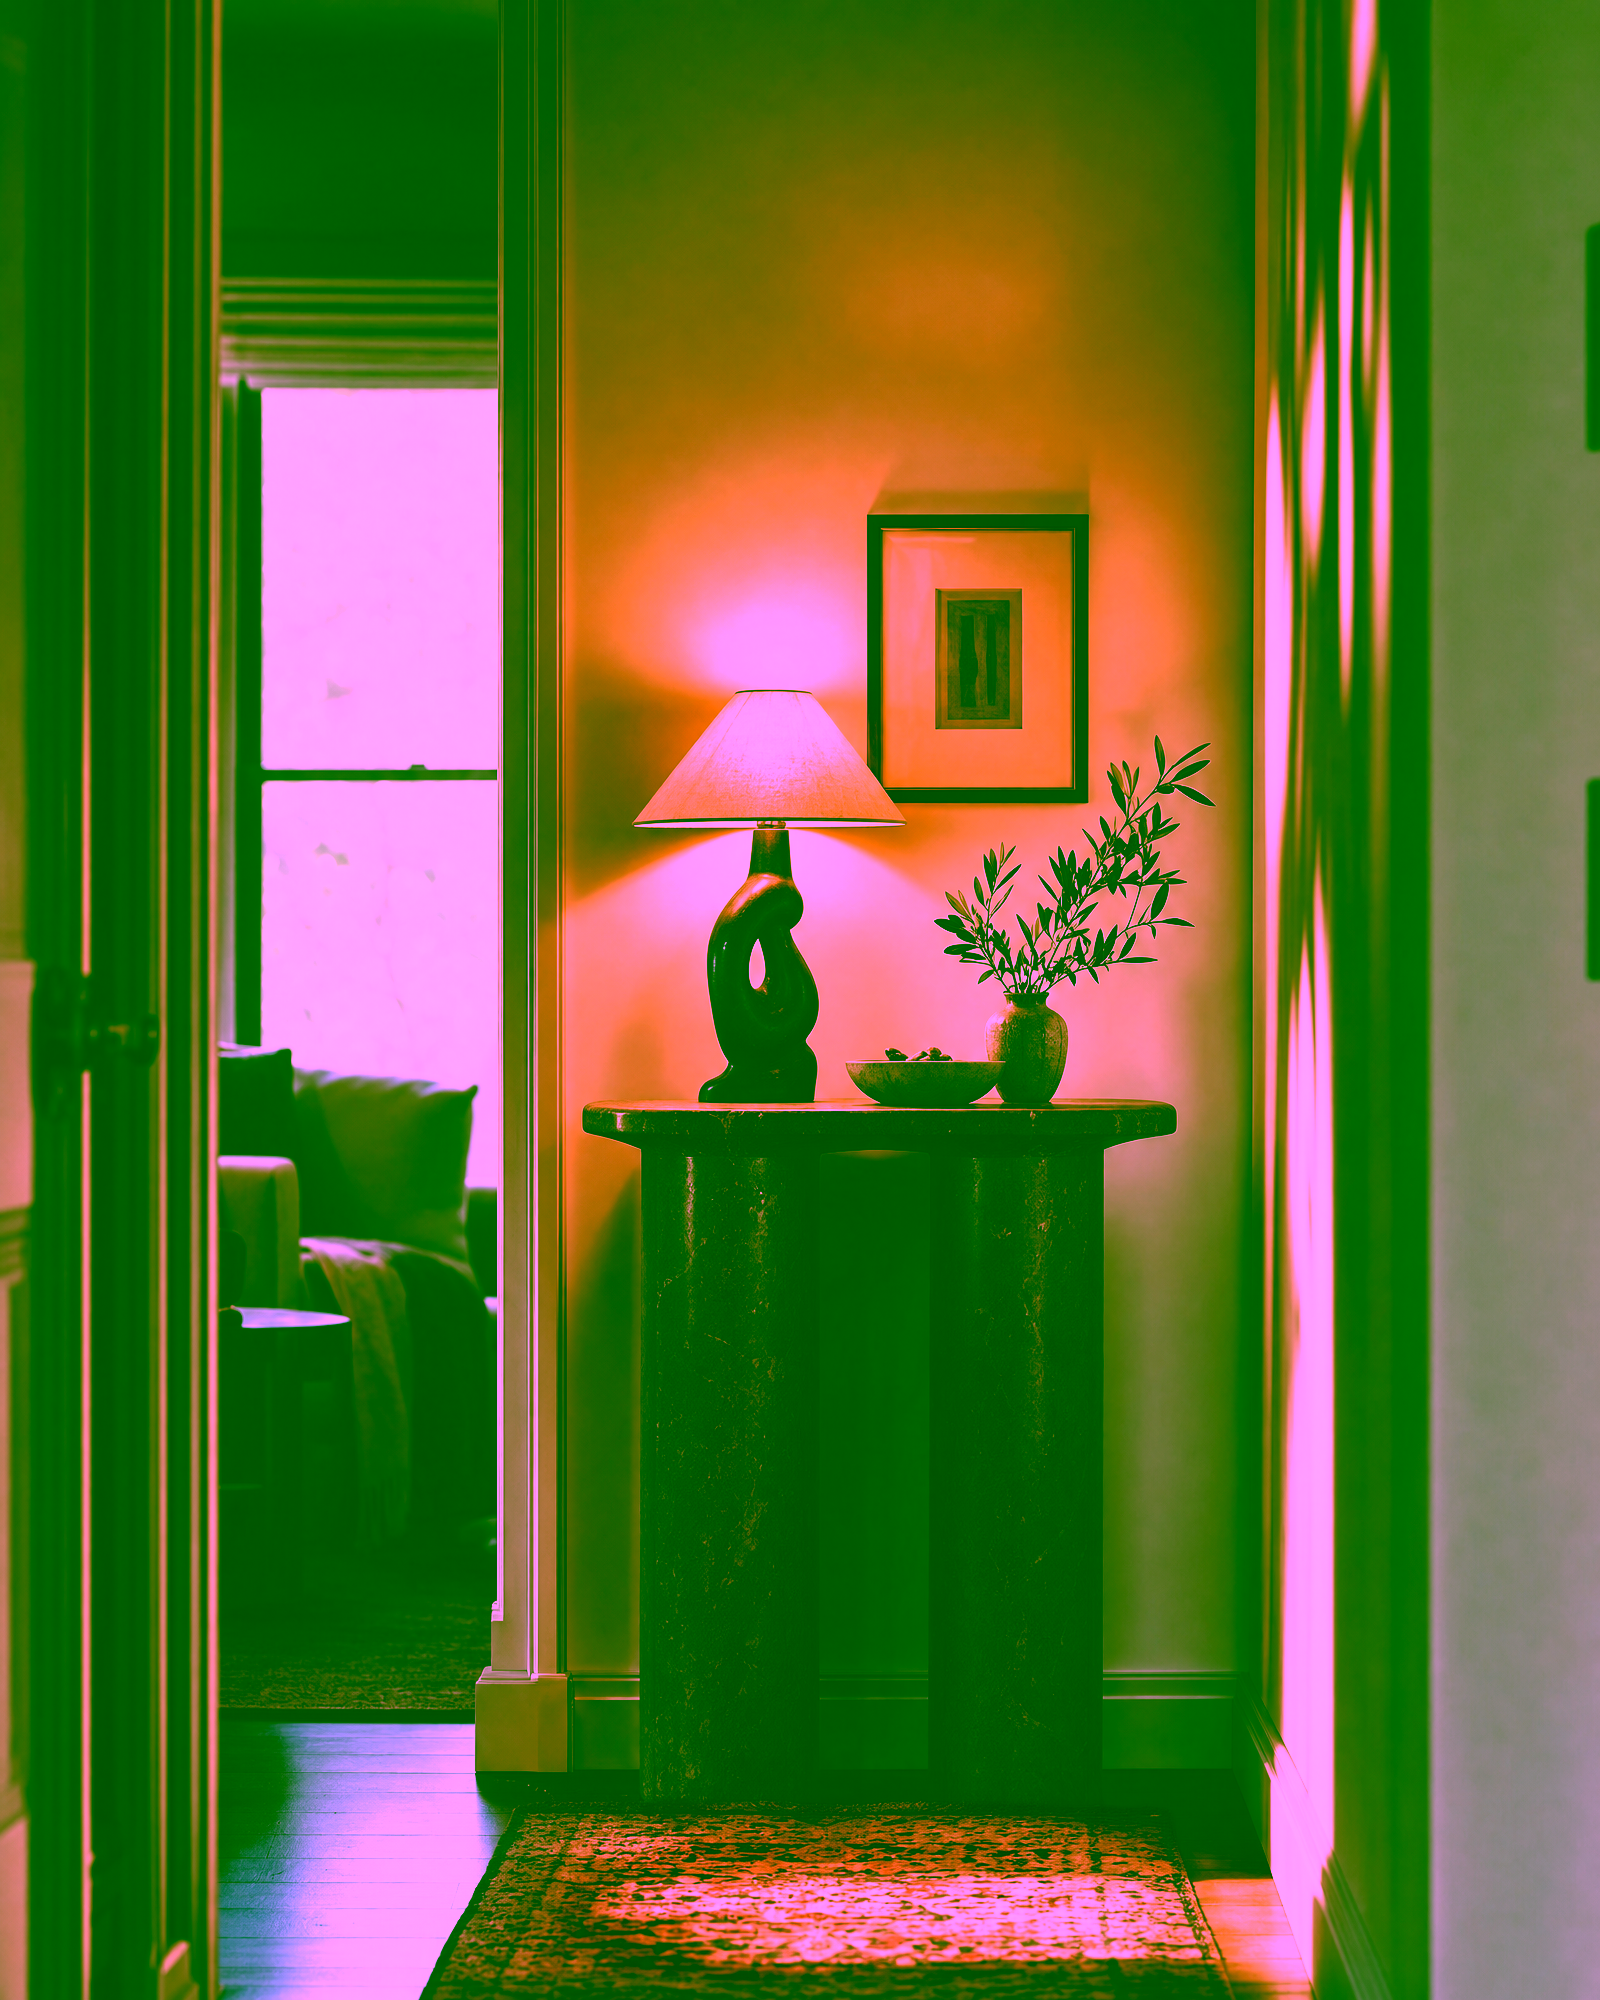
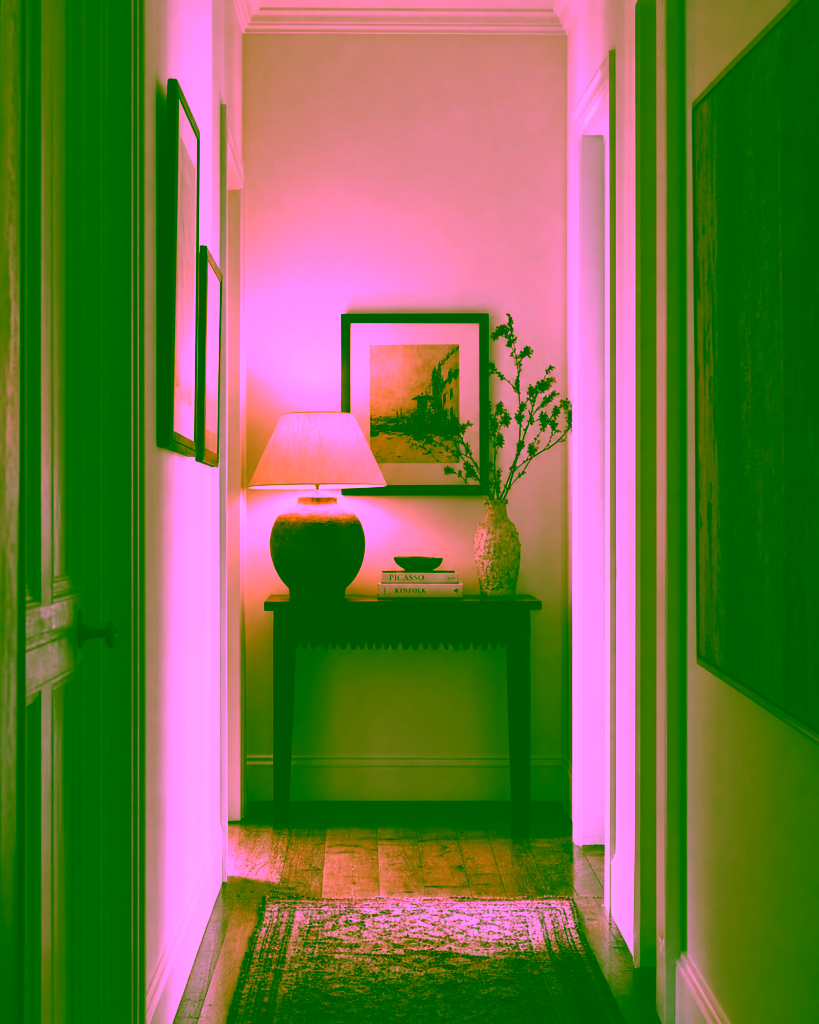
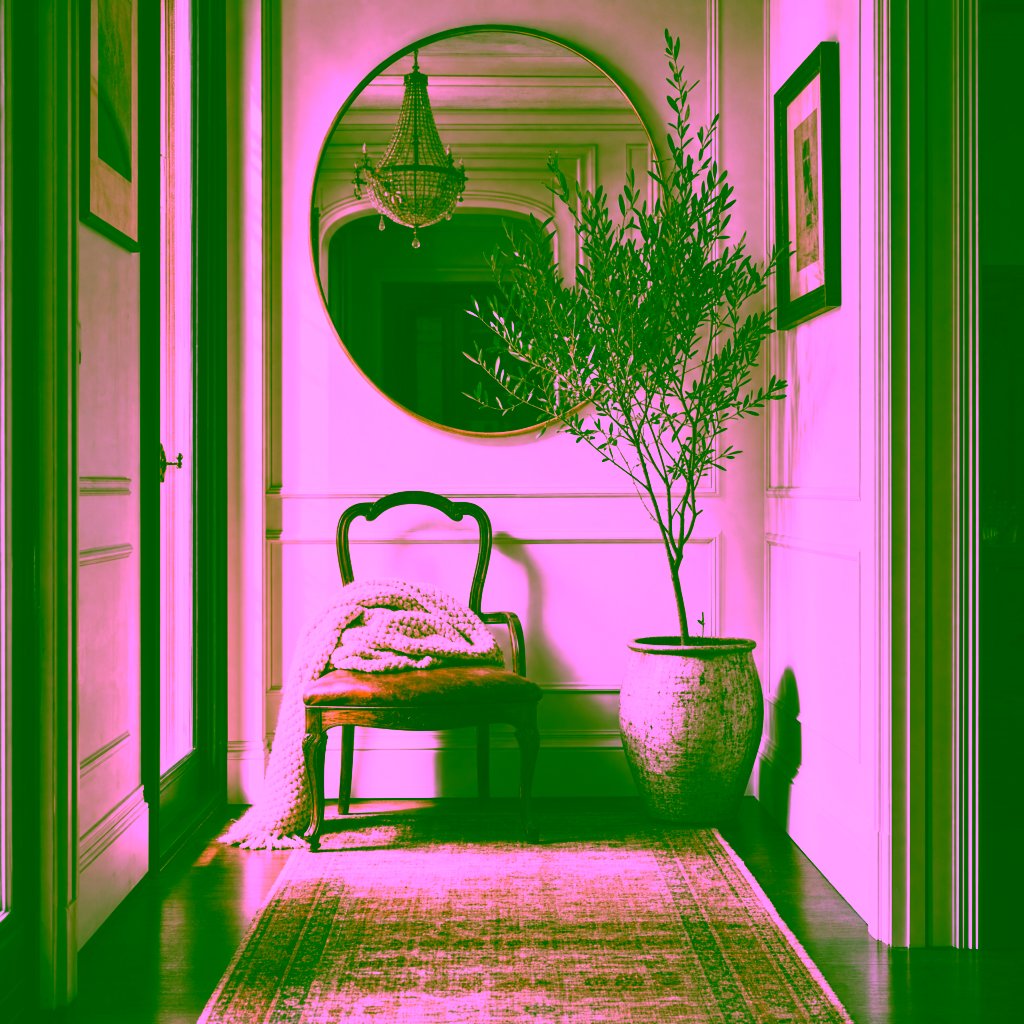
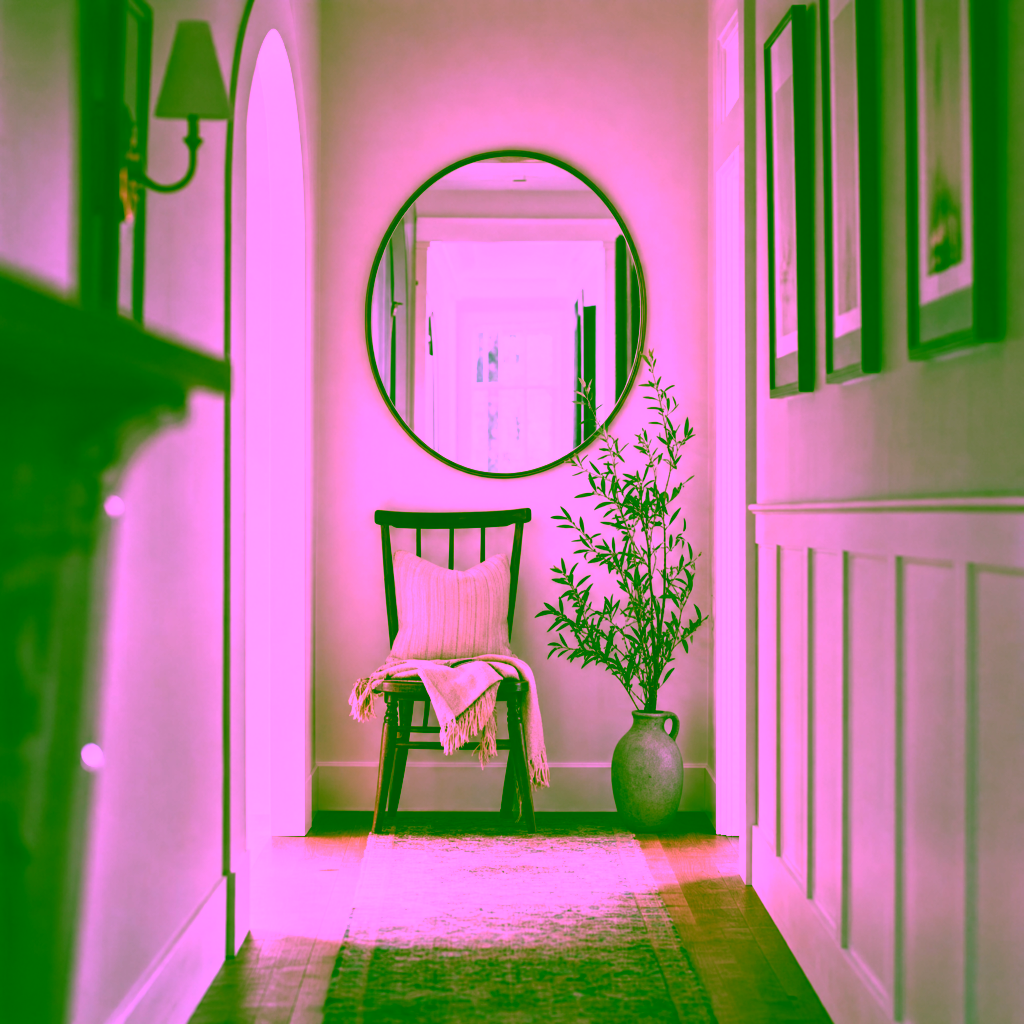
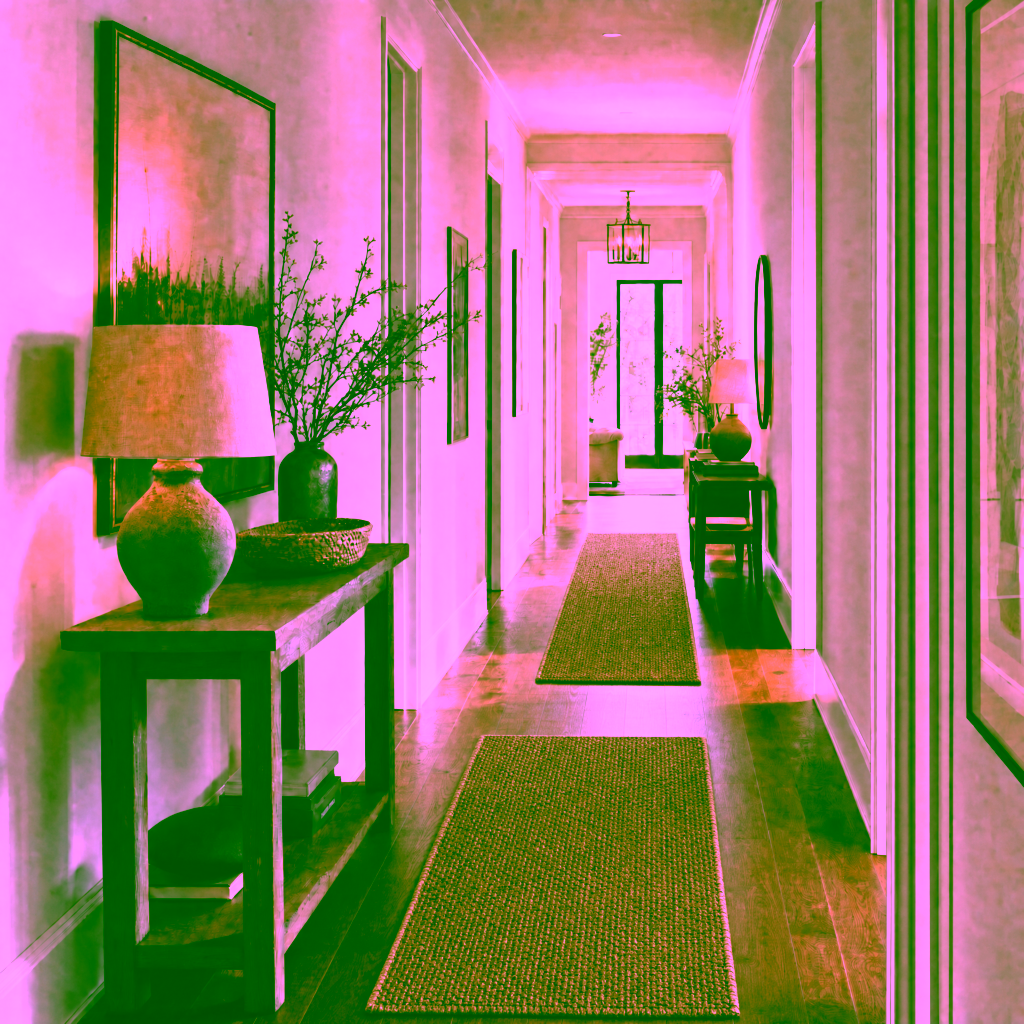
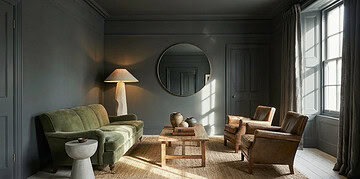
End Of Hallway Moments: The Easiest Grand-House Trick
If you only changed one thing after reading this, start with hallway dead-ends.
A hallway that just… stops… in a blank wall is like a sentence with no punctuation.
A hallway that ends in a vignette feels intentional and a bit grand. Detailed. Thought out. Considered.
Adding something here creates a moment, and in a way, expands space but filling it with curated items.
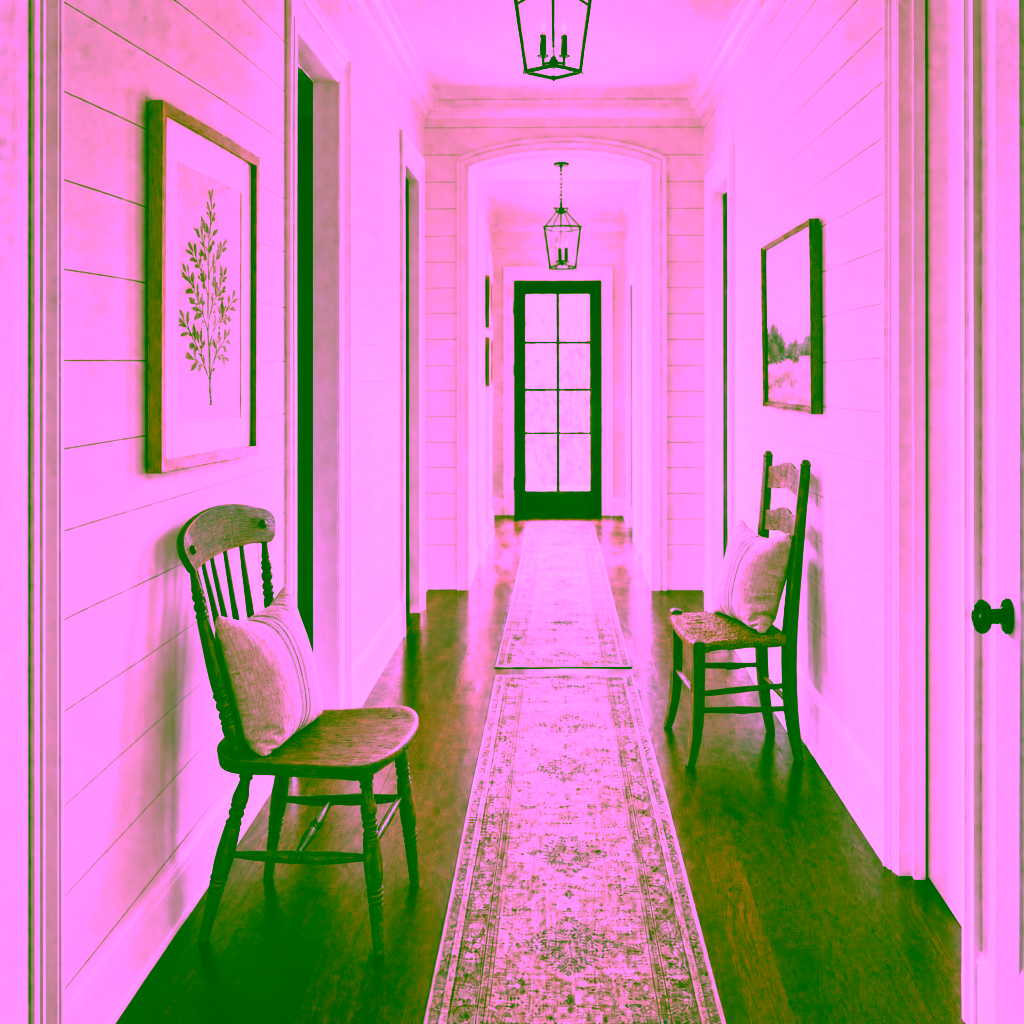
It sounds like you need to buy things – often you don’t.
It can be the extra dining chair, needed only four times a year but rests here patiently the rest of the time with a throw cushion and a mirror reflecting light back into the hallway.
How Much Space Do Vignettes Need?
More than you think? Less than that.
- Minimum width of hallway to work comfortably:
About 100–110 cm (39–43″).
(If you can walk two people past each other without turning sideways, you’re fine.) - Depth of furniture at the end of the hallway:
Aim for 30–35 cm (12–14″) deep or less.
Narrow console, slim cabinet, or even a wall-mounted shelf. - Clearance in front:
Try to keep at least 80–90 cm (31–35″) of walking space.
If your hallway is narrower, use wall-only vignettes: art + wall light + small shelf. You still get the “destination” effect without sacrificing flow.
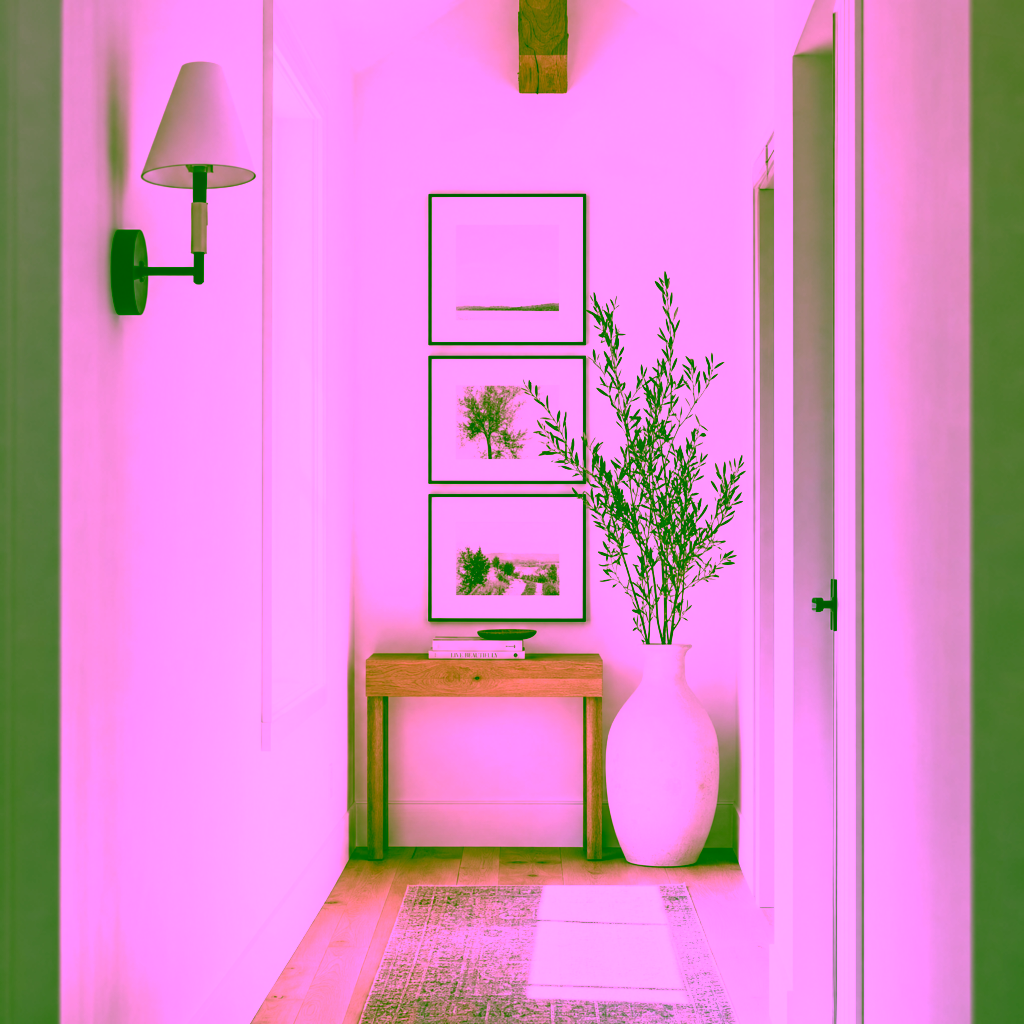
A Simple “Copy + Paste” Hallway Vignette
Stand at the hall entrance and look toward the end.
Now imagine this stacked, bottom to top:
- Grounding:
A narrow console or small bench, 70–80 cm (28–31″) high, no deeper than 35 cm (14″). - Vertical anchor:
A single piece of art or a framed print about 60–80 cm (24–31″) wide, centred above.
Or a grid of two or three smaller frames. - Light:
A table lamp on one side, or a pair of small wall sconces framing the art. - Character:
A ceramic vase with a simple branch, a small stack of books, a bowl or dish for keys.
Think: 1 tall object, 1 medium, 1 low + something soft or organic.
One sculptural lamp, one art print, one ceramic or one tray, job done.
You’ve just turned a dead-end into a destination — and made your house feel like it’s hiding a quiet gallery moment just for you. And if you don’t have the space or the budget, change things around but use the same formula.
Between Rooms: The “Why Is This Wall Here?” Vignettes
The wall space between two doorways might be the most under-utilized design asset in suburban history.
It’s often:
- 60–120 cm (24–47″) wide
- Flat, featureless, and apparently waiting to be discovered and used.
Which is to say: perfect real estate.

How To Know If A Narrow Wall Can Host A Vignette
A quick rule of thumb:
- Wall width:
If you have 50–60 cm (20–24″) of clear wall, you can do a wall-only vignette (art or mirror + sconce + tiny ledge). - Floor space:
If you can place something 25–30 cm (10–12″) deep without clipping the doorway swing or making you sidestep, you can do shallow furniture vignettes.
Open both doors that flank the wall. If they can fully open without hitting your imagined piece, you’re safe.
A Copyable “Between Rooms” Vignettes Formula
Keep it light and vertical so it doesn’t feel like a barricade.
Try this stack:
- Furniture:
A narrow console or small pedestal, 25–30 cm (10–12″) deep. A thin tall boy, book case or desk. - Above:
One piece of art or a mirror that relates to the adjacent rooms: - Between kitchen and dining → food or still-life inspired art
- Between bedroom and bathroom → something calming, textural, or abstract
- Objects:
A tray with a candle and a small sculptural object, plus one taller piece (a lamp, or a vase with a single stem). - Optional layer:
A small runner or mat that visually links the two rooms and “invites” you through.
You’re not decorating a room; you’re acknowledging a moment, a transition between rooms.
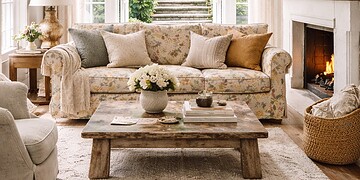
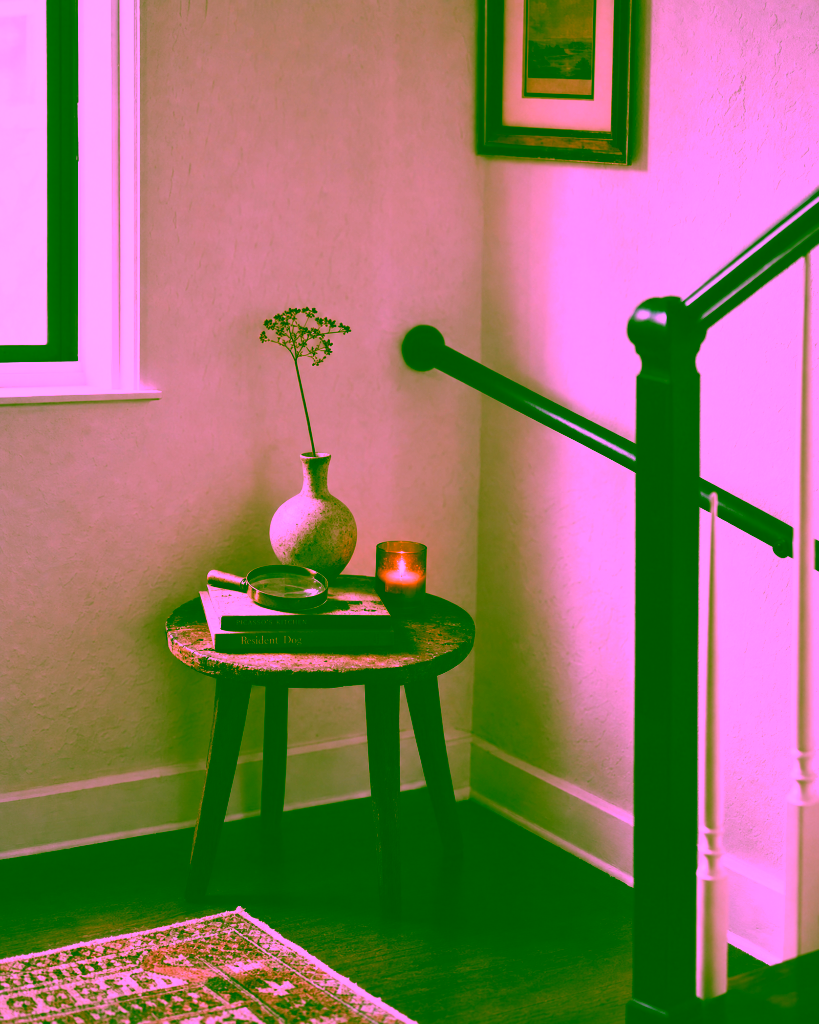
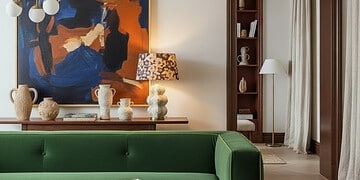
Dead Corners: From “Awkward” To “Oh, Hello”
Every home has a corner that feels like a storage suggestion:
- The corner of the living room behind the sofa
- The turn in a hallway where it bends 90 degrees
- That random space beside the fridge or pantry
These corners are prime vignette territory because you naturally slow down when you turn.
How Much Corner Do You Need?
- Minimum footprint:
If you have a square about 60 x 60 cm (24 x 24″), you can create a corner vignette. - Clearances:
Make sure doors can open and you’re not walking directly into the furniture.
If you can walk past with at least 75–80 cm (29–31″) of clear path, you’re fine.
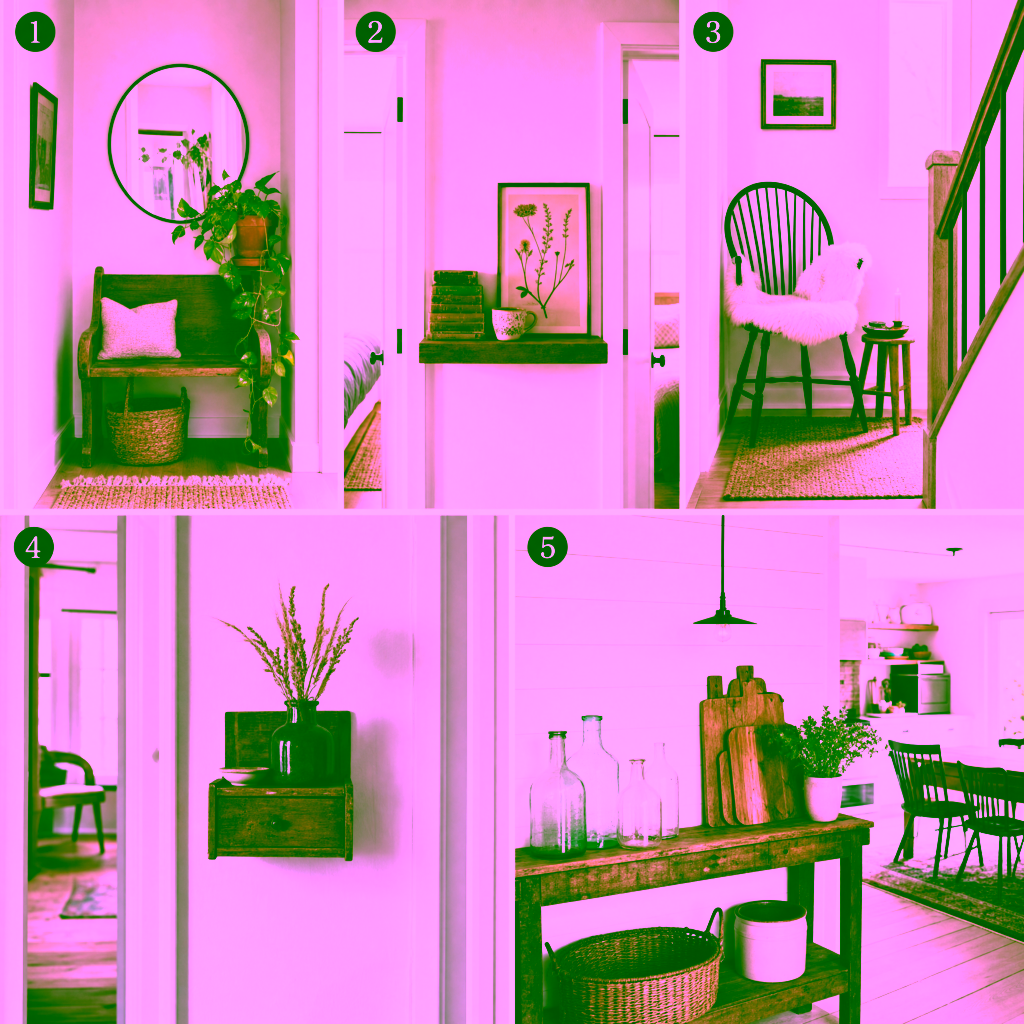
Three Easy Corner Vignettes To Steal
- The Reading Hint
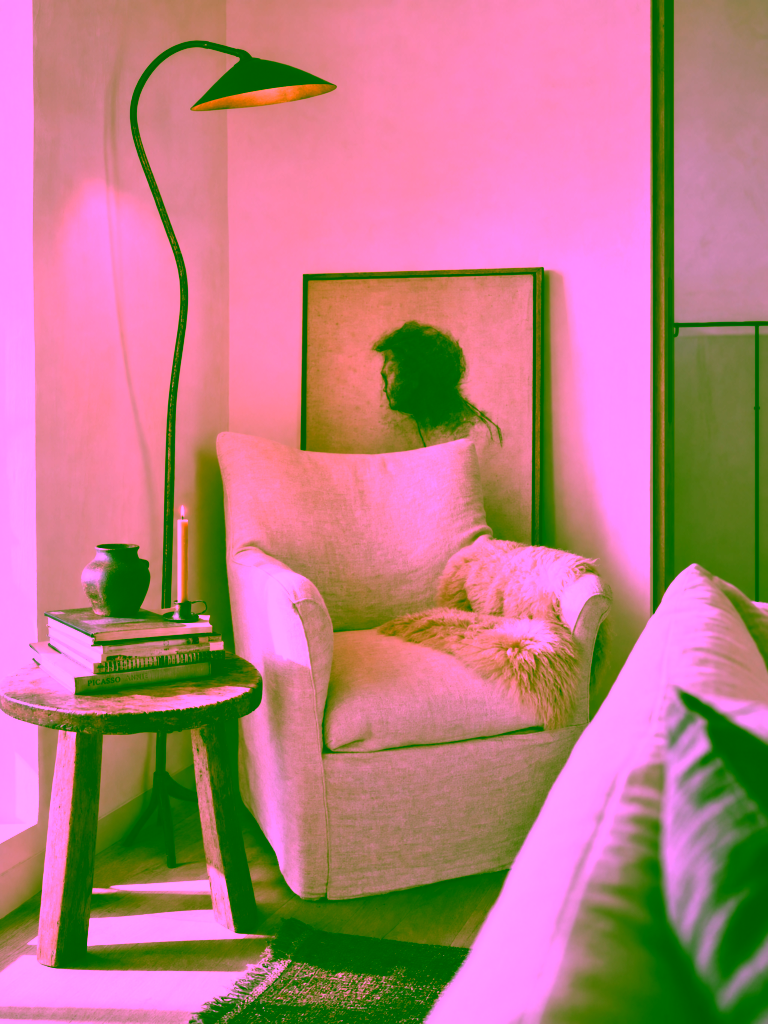
- A slim floor lamp
- A small side table (40–50 cm / 16–20″ diameter)
- A stack of books and a candle
- A comfortable chair
Even without a chair, it makes the room feel more lived-in.
2. The Plinth Moment
- A narrow pedestal or plant stand
- One sculptural object (a vessel, a bust, a dramatic plant)
Corners love vertical drama. A sculptural vase or object earns its keep.
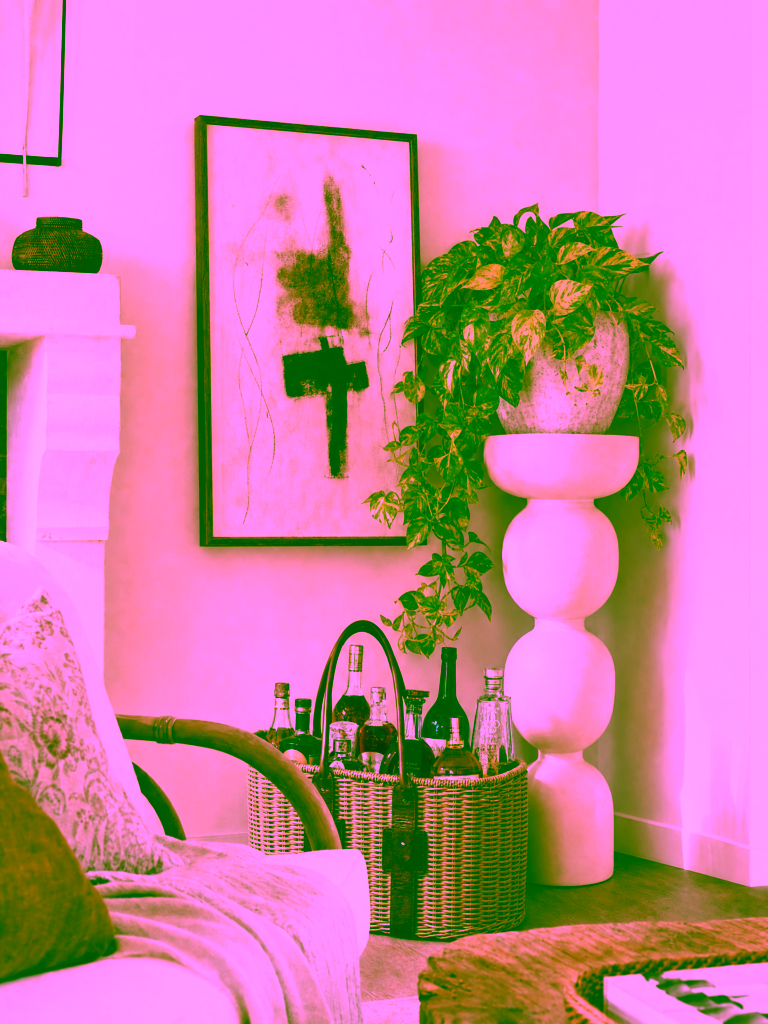
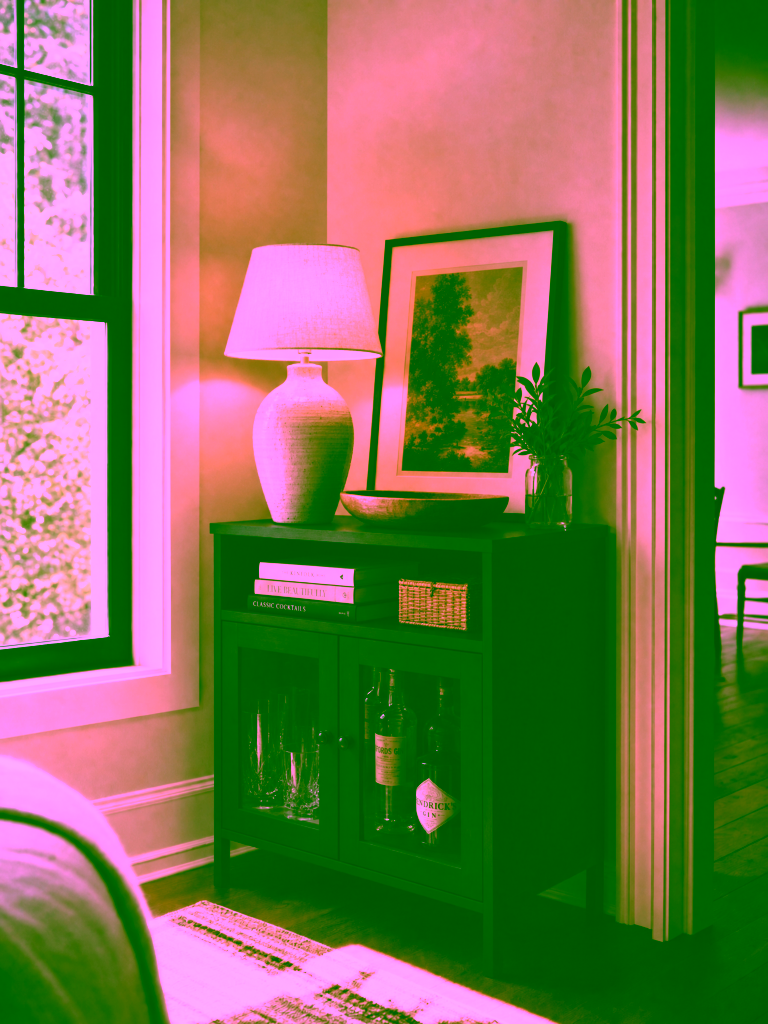
3. The Layered Light Corner
- A small cabinet, trunk or drinks trolley
- A table lamp + framed art leaned casually against the wall
- A bowl or tray to catch keys, books, or drinking glasses.
These all work in rentals too: minimal wall fixing, maximum atmosphere. Never discount budget friendly swaps. Study the look you want and see if you find a similar look for less.
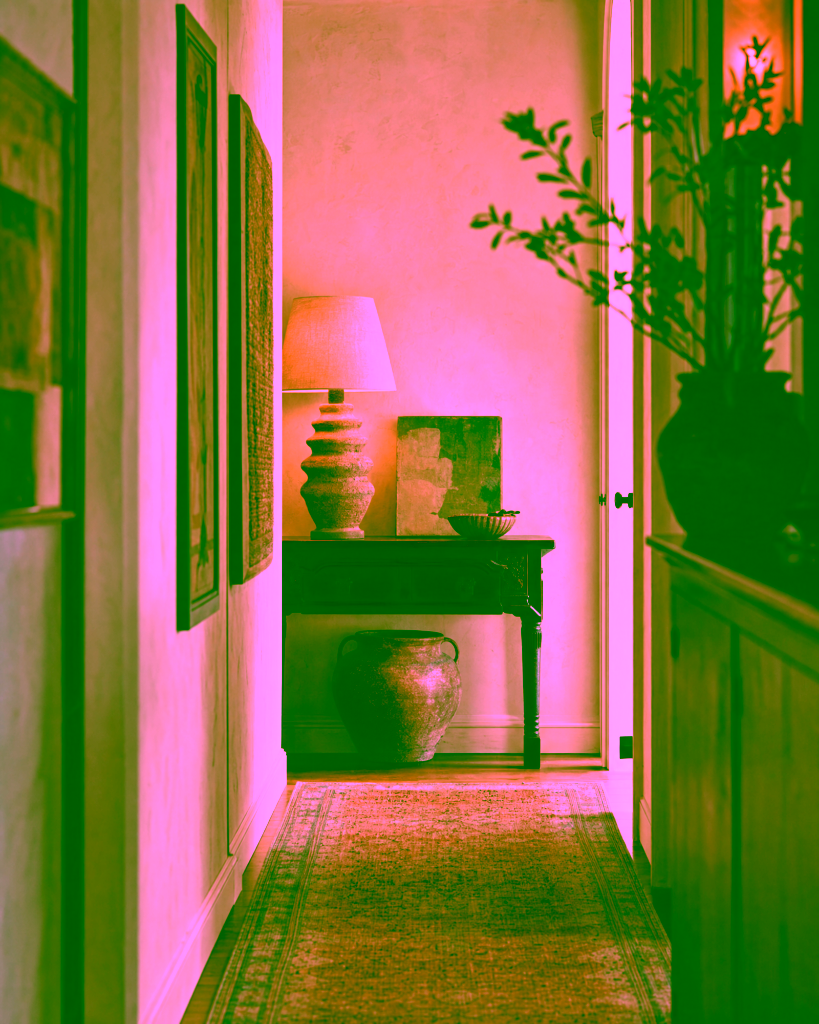
Hallway Niches & Landing Vignettes: Built-In Moments Waiting For You to Stay
If your home has:
- A recessed niche in a hallway
- A shallow bump-out
- A stair landing large enough to stand on without clutching the rail in fear
…you have ready-made vignette zones.
The Stair Landing Rule
Landings are circulation, so safety and flow first.
- Minimum landing depth:
If you have at least 90 cm (35″) from riser to wall, and the building code isn’t being violated, you can consider a small piece. - Furniture depth:
Keep it very shallow — 25–30 cm (10–12″) max. Think wall-mounted shelf, narrow console, or just a bench. - Head height:
Ensure nothing you place will be at forehead level if someone stumbles. Soft edges, rounded corners, and no sharp protrusions, please.

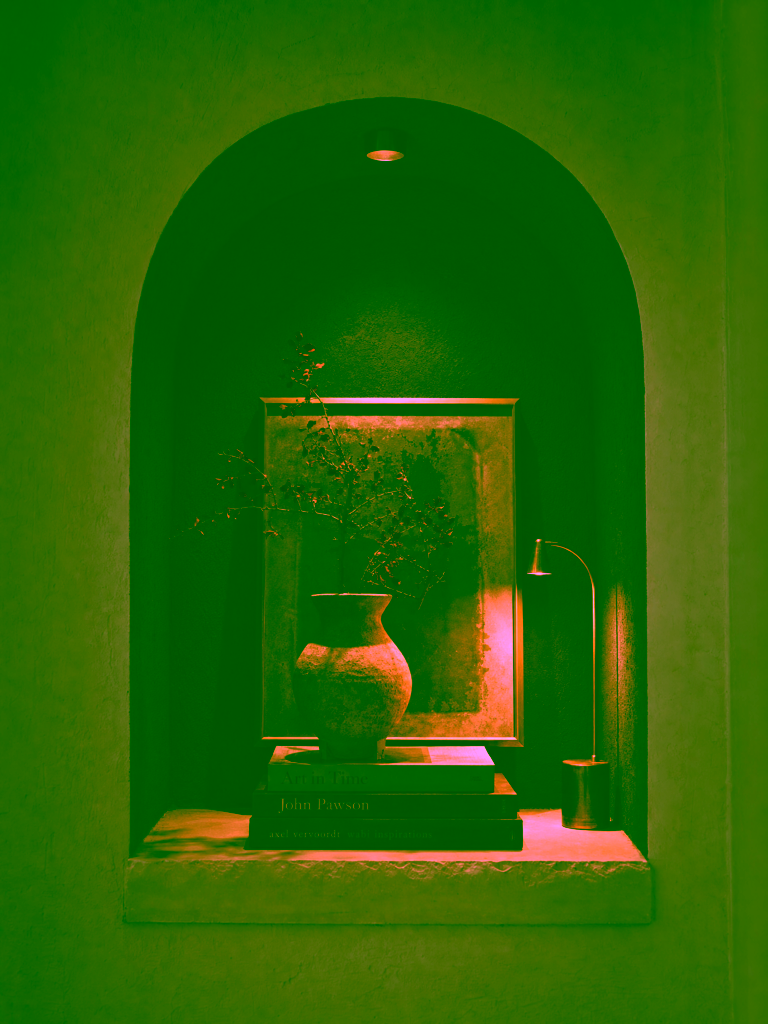
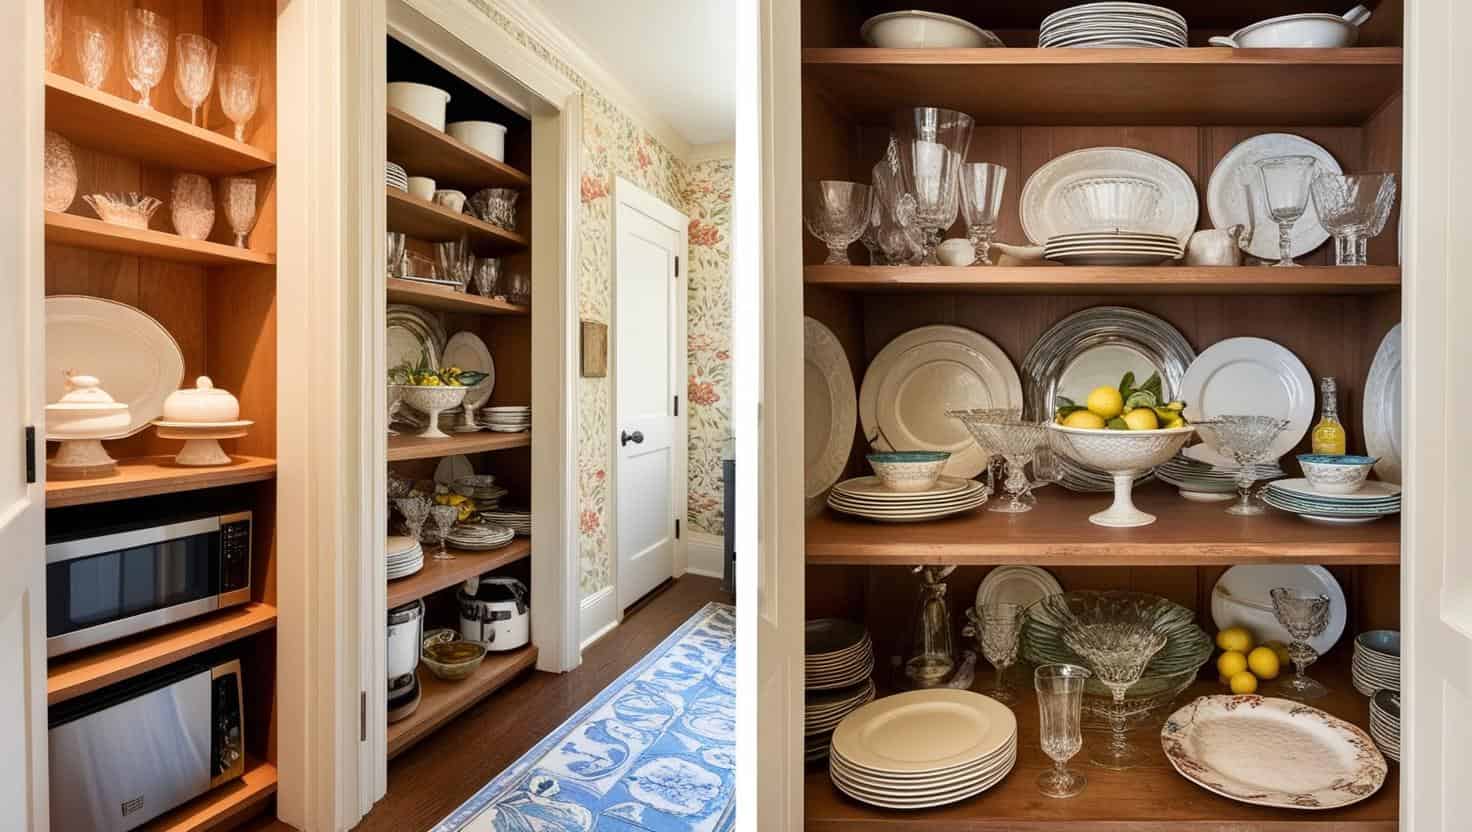
Niches: Treat Them Like Mini Stages
Instead of one lonely object, think in layers:
- Back:
Art or a mirror at the rear of the niche. - Middle:
A lamp or tall vase (adding depth and a bit of drama). - Front:
Smaller pieces: a bowl, small stack of books, candle, or a framed photo.
If your niche is very shallow, this can all be done in 20–25 cm (8–10″) of depth.
You’re not filling a hole in the wall; you’re putting on a tiny performance. This is one way, Nate Berkus, has some great ideas here.
Awkward Wall Runs: When “Too Long, Didn’t Style” Becomes A Feature
Long, uninterrupted walls are tricky.
They can make a hallway or room feel like a bowling alley: all length, no moments.
Designers break these walls into beats — and use vignettes to do it.
How To Break Up A Long Wall
Stand at one end of the wall and walk its length. Mark (mentally or with painter’s tape):
- Where a hallway turns
- Where a room starts or ends
- Where natural light shifts (a window, then a stretch of shadow)
- Where you tend to pause: near a door, a thermostat, a light switch
Those points are your “beat markers for your vignettes.”
Between each, you can introduce:
- A console vignette – that might mean two similar (not exactly the same) console vignettes
- A small bench with art above
- A single chair with a side table and light
- A run of art paired with one grounded furniture piece
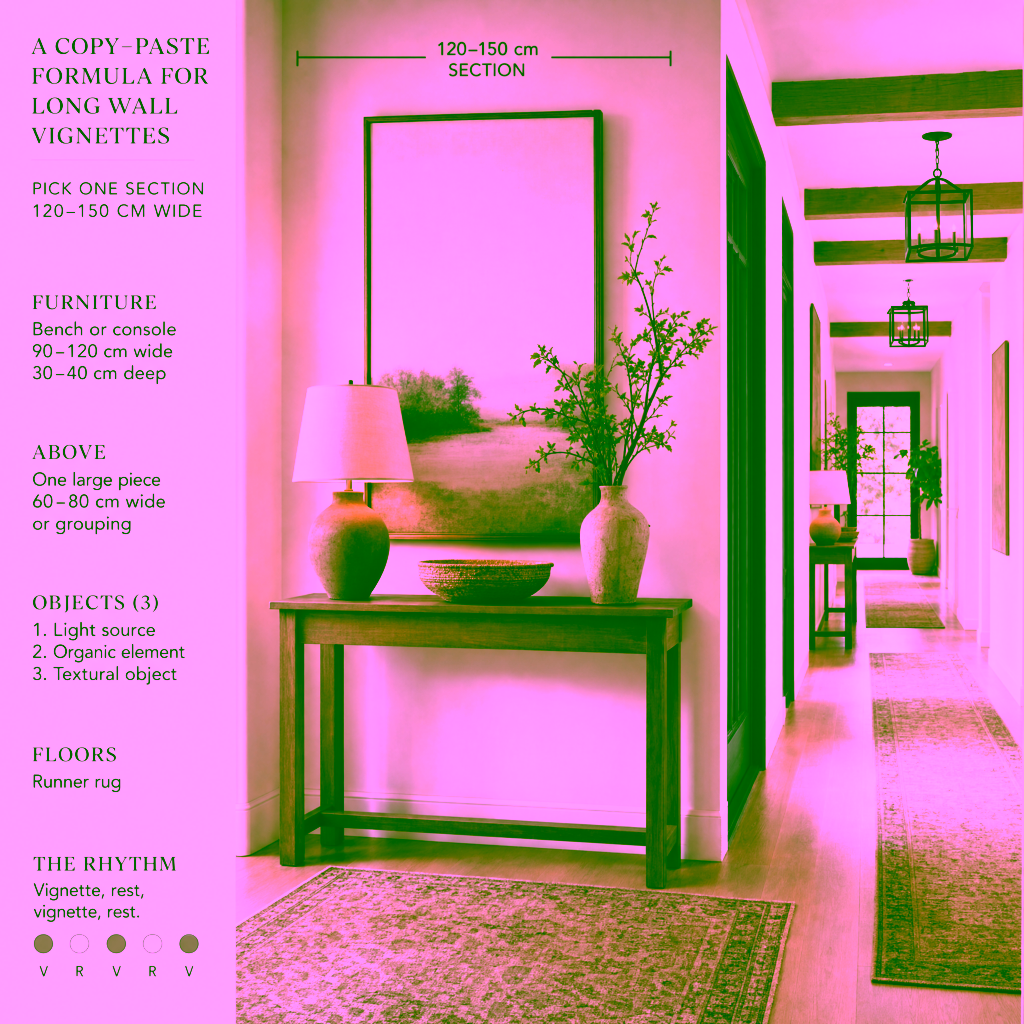
A Copy-Paste Formula For Long Wall Vignettes
Pick one section no wider than 120–150 cm (47–59″).
- Furniture:
One or more – bench or console 90–120 cm (35–47″) wide, 30–40 cm (12–16″) deep and a chair if there is room. - Above Each Bench or Console
Either one large piece (60–80 cm / 24–31″ wide) (art or mirror) or a grouping of 3–5 smaller frames. - Objects:
One light source, one organic element (flowers, branches, plant), one textural object (ceramic, woven basket). - Floors:
Runner rugs either in front of bench or consoles to ground the space, or, in-between consoles. Which ever is more pleasing to the eye and the space.
Repeat rhythm rather than content down the wall:
Bench + art + lamp here, then 4–6 feet later, just art, then repeat.
Vignette, rest, vignette, rest.
Your eye starts to travel in a much more interesting way.
Need a simpler solution? Dining chairs that are surplus most of the year, or that vintage chair you bought and you’re not quite sure what to do with, are perfect candidates for creating a small vignette along a long wall.
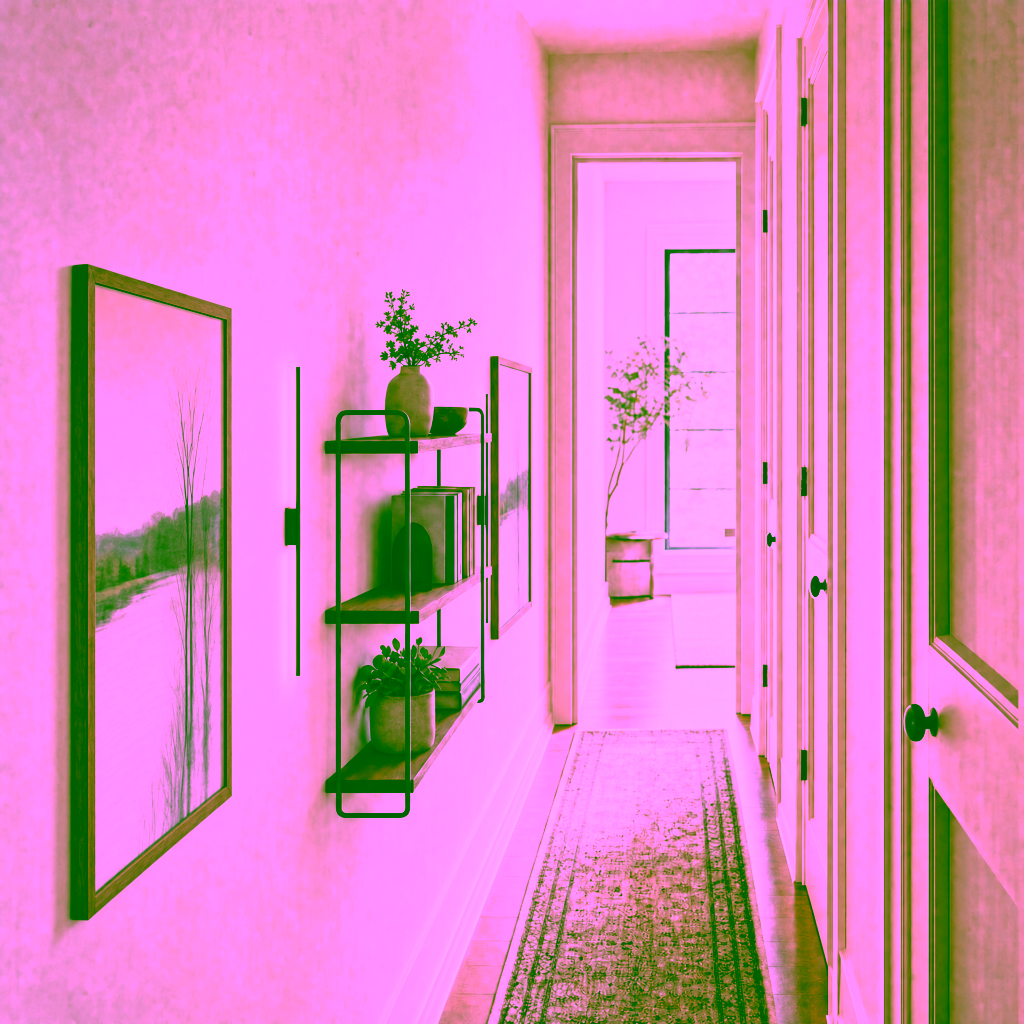
And if you have a house, where your long wall is just one one side of the house, we suggest the solution above. In this case, the sconces go beside what you want to light (the shelf), and the art provides the wider visual frame, giving you visual interest as you waltowards your desitnation
How To Test Potential Vignettes (Without Buying Anything)
Before you start ordering consoles like you’re furnishing a boutique hotel, road-test your vignettes first.
The Tape + Chair Test
- Use painter’s tape on the floor to mark the footprint of a potential vignette.
- Depth: 25–35 cm (10–14″)
- Width: 60–100 cm (24–39″)
- Live with the taped area for a day.
If you or anyone else in the house trips over the idea of furniture, it’s too deep or too wide. - Place a dining chair or small stool on the taped space.
Walk past as you normally would.
If it feels like an obstacle course, slim down.
If you barely notice it, you’re in business.
The Eye-Level Test
Stand at the point where you first see that wall or corner.
Ask:
- If there was one beautiful scene here, would I see it often?
- Does light hit this area at any point in the day? (Bonus points for yes.)
If the answer to both is yes, that’s prime vignette territory.
What Designers Know About Vignettes That Instagram and Pinterest Don’t Always Show
Most online imagery freezes vignettes in isolation: cropped console, styled tabletop, maybe a sprig of eucalyptus for moral support.
Designers are thinking about something else entirely: sequence.
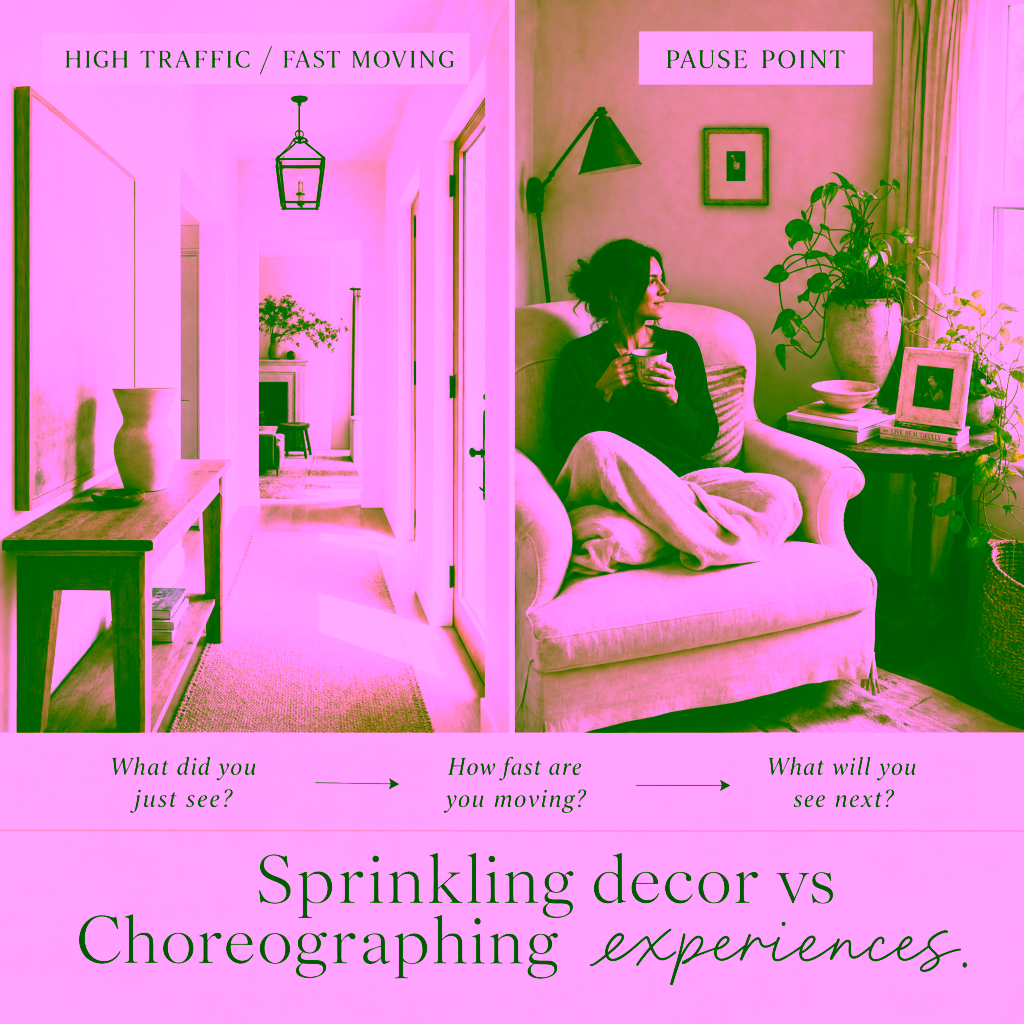
They ask:
- What did you just see before this moment?
- What will you see immediately after?
- How fast are you moving when you encounter it?
Vignettes in high-traffic, fast-moving areas need to be simpler and bolder: fewer pieces, stronger shapes, clear silhouette.
A vignette in a pause point — a landing, a corner with a chair — can be more layered and intimate. That’s where the bowl you love can sit next to a tiny stack of books and a framed photo you’d actually stop to look at.
Once you start thinking like this, you stop “sprinkling decor” and start choreographing experiences.
Step-By-Step: Creating Your First “Forgotten Space” Vignette
Let’s put this into a simple process you can repeat.
Step 1: Pick One Location
Choose just one:
- End of a hallway
- Wall between two bedroom doors
- Dead corner in living or hall
Don’t start everywhere. Start somewhere.
Step 2: Measure Your Real Estate
You only need three numbers:
- Width of wall (in cm or inches)
- Depth you’re willing to “give up” (start at 25–30 cm / 10–12″)
- Remaining walking clearance (aim for 80–90 cm / 31–35″)
If your depth has to be 20 cm (8″) or less, plan a wall-only vignette: art + light + maybe a tiny ledge.
Step 3: Choose Your Anchor
Anchors can be:
- A piece of furniture (console, bench, pedestal)
- Or, on narrow spaces, a single large piece of art or a mirror
If in doubt, go for:
- Console height: around 75–85 cm (30–33″)
- Art centre: around 145–155 cm (57–61″) from the floor, depending on your height
Step 4: Layer In Light
Vignettes without light are missed opportunities – to make rooms feel bigger and as functional spaces at night.
Options:
- A table lamp (with a cord neatly managed)
- A battery-operated lamp if sockets are a problem (renters rejoice)
- Wall sconces if you can wire or use plug-ins
- Even a candle can count, though it’s more “momentary magic” than everyday function
Step 5: Add 3–5 Objects With A Little Restraint
Use this simple formula:
- 1 tall element (lamp, branch in a vase, tall sculpture)
- 1 medium element (stack of 2–3 books, a box, a framed photo)
- 1–2 small elements (bowl, vase, candle, small object, beads)
- Optional: something organic (branch, flowers, plant)
Its an opportunity to let beautiful pieces shine, and less about a place to store items. Keep your palette controlled: if your hallway is calm and neutral, maybe your objects are where a little Pearl + Creek texture show up.
Step 6: Edit Ruthlessly, Then Walk Past
Once it’s styled, walk through as you normally would.
Ask:
- Does anything catch? (Your sleeve, your bag, your hip?)
- Does your eye go to one clear focal point, or is it all noise?
- Could you remove one thing and make it better? (The answer is almost always yes.)
When it feels like a little exhale rather than a visual traffic jam, you’ve nailed it.
How Vignettes Change The Way Your Home Feels
You’ll know your vignettes are working when:
- Hallways feel less like tunnels and more like galleries.
- You find yourself stopping for a second where you used to rush past.
- Houseguests touch things. They’ll run a hand over a console, pick up a book, comment on a print.
Those micro-interactions are the difference between “nicely furnished” and “this house is so you.”
And yes, it’s exactly what you experience in those grand, enviable homes — the ones that somehow feel layered, personal, and expensive without screaming about it.
They have vignettes exactly where you least expect them.
Not just in the “Instagram spots,” but in the humble, hard-working corridors of the home.
Where To Go From Here
You don’t need to overhaul your house to get this effect.
You just need to:
- Identify one forgotten space
- Give it 60–100 cm (24–39″) of attention
- Anchor it, light it, and layer a few pieces with purpose
From there, you can start playing with:
- Why vignettes make homes feel wealthy and layered (the emotional side)
- How designers build vignettes differently for public vs private spaces
- Unlocking even stranger little pockets of space you didn’t know you had
But that’s for the next articles.
For now, walk your home again and look for the places that make you pause — or ought to.
Those are your new design sites.
And the next time someone says, “Your house just feels so considered,” you’ll know it’s not the sofa doing all the work. It’s the tiny, deliberate scenes you’ve quietly built along the way.